

A basic guide showing you how to not screw up a meringue. And how to achieve that crispy outside and that soft, pillow-like inside.

Meringues were something I just kept messing up, and it took me a while to figure out why. Something you have to understand when working with any form of eggs is that they are sensitive to heat. Once you understand that fundamental, meringues suddenly become super easy to make.
Care and attentiveness are also important with meringues. Not like it isn’t with any other dish, and I know that you’re only working with a couple of ingredients here. However, try to pay attention to what’s going on.
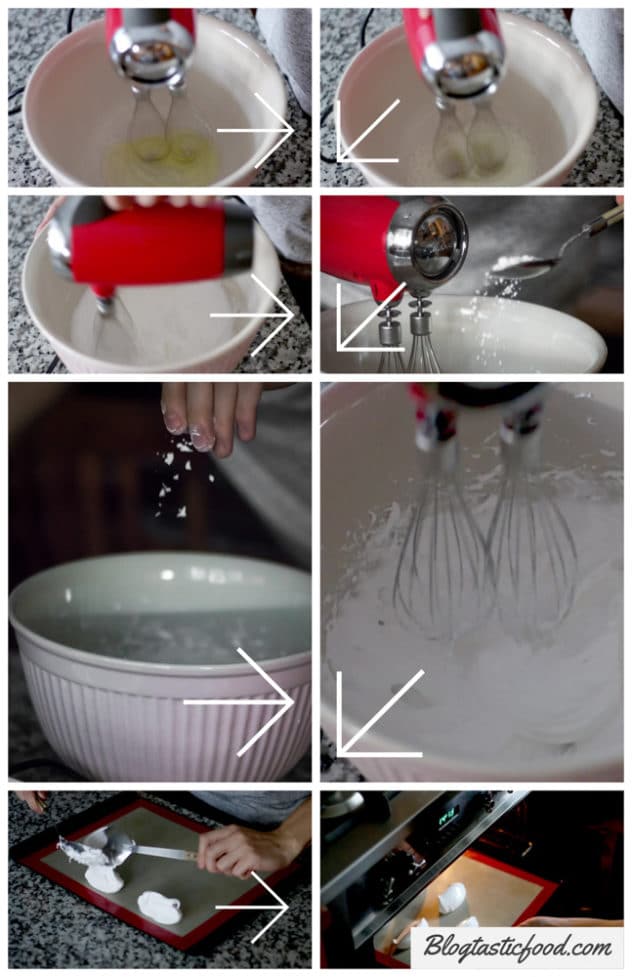
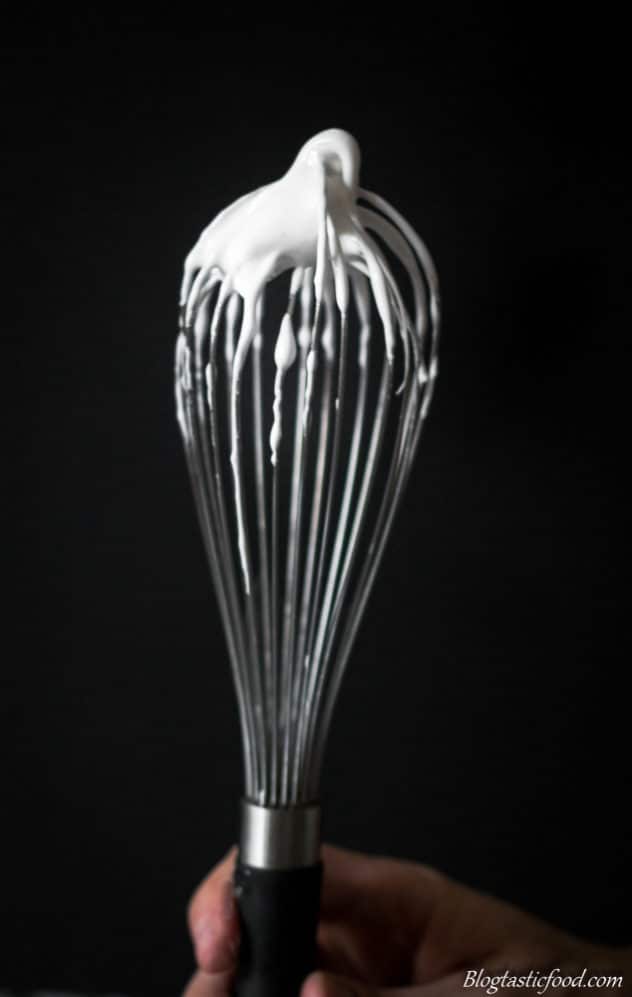
Pay attention to the egg white as your beating it. Is it soft peaks or stiff peaks? Try to incorporate the sugar slowly, make sure it’s well incorporated and look to see if the meringue mixture has that nice gloss and shine before cooking it.
Let’s go into more detail so you can understand this process a bit better.
low and slow
Whenever I cook meringues, I like to think of it as a drying out process more so than a cooking process. If you put meringues in an oven that is just blasting with heat (which is what I used to do), it will just caramelize (or burn). And then you’ll find that the meringue doesn’t even go hard on the outside, but rather it will just stay soft and go all shriveled.
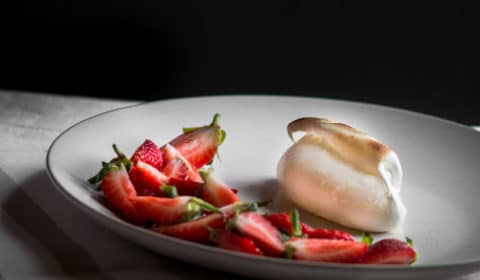
Not to mention it will probably taste dreadful too. Here’s the difference between a good meringue and an overheated one.
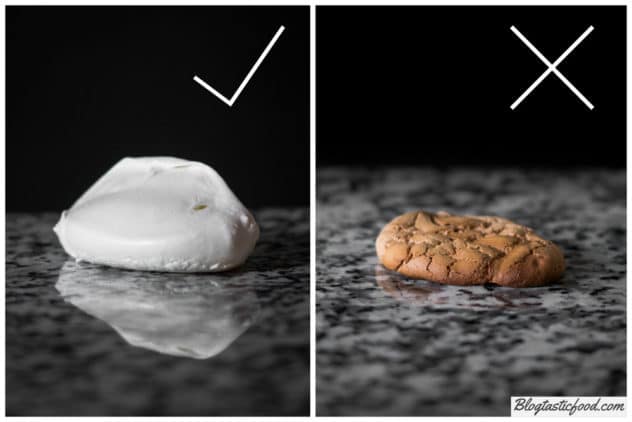
How did I achieve a good meringue? By slowly cooking the meringue at a lower temperature. I cook my meringues at around 100-110 degrees C (220-230 degrees F) for about 50-60 minutes. And that method has never failed me since. Place the meringues on the middle rack of the oven as well, rather than on the high or low rack.
You do that and you should be absolutely fine.
Using acid
I am not going to get all scientific on you guys but acid actually stabilizes egg white. I believe this happens because the acid delays the coagulation process. Which just means that it will help the mixture stay light and fluffy for a longer period of time.
Some people like to add a bit of lemon juice or cream of tartar to their meringue mixture. I personally don’t use it most of the time and I don’t think it’s absolutely essential. I will, however, add it to my recipe as an optional ingredient if you want to use it as a “just in case” ingredient.
I believe it’s more important to understand that weather you use acid or not, you should get the meringue onto the tray and into the oven as soon as you can. So line your tray and pre-heat your oven before you start making the meringue. Not that you have to rush or panic, but don’t let that meringue mixture sit around for too long because it will eventually loose it’s air and stability.
Add icing sugar instead of caster sugar
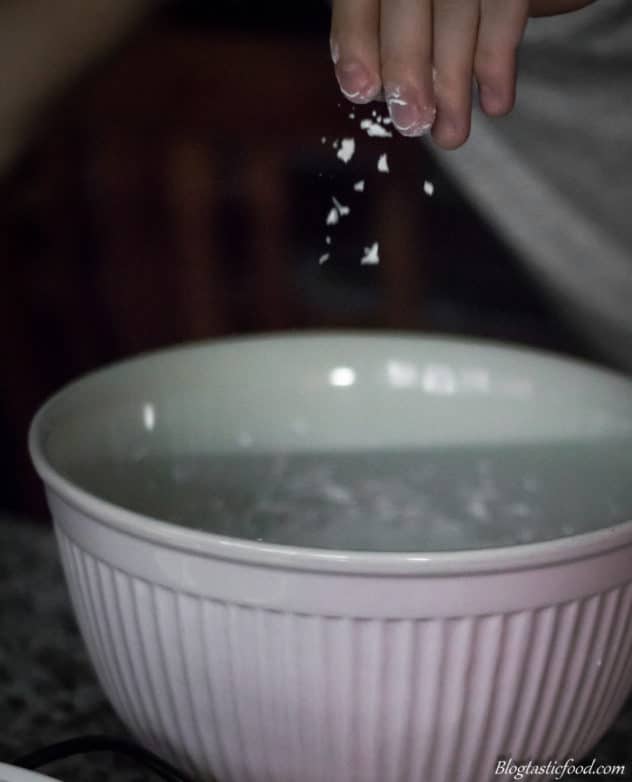
When you make your meringue mixture, you should make sure that all of the sugar is dissolved before you start cooking it. When I used caster sugar to sweeten my meringues, I would rub a bit of the meringue mixture between my fingers to see if all the sugar was dissolved. If the mixture felt grainy, I would continue whisking.
I found that it took some time for the sugar to dissolve. So instead I tried using icing sugar (I believe you Americans call it confectioner’s sugar). This doesn’t make the meringue better or worse, the icing sugar will just make your life that little bit easier.
It’s just something to keep in mind but if you already have caster sugar and you feel that there is no point in going out and buying icing sugar, feel free to just use the caster sugar instead. Oh and if you do use icing sugar, just sift it first to get rid of those clumpy, rocky bits.
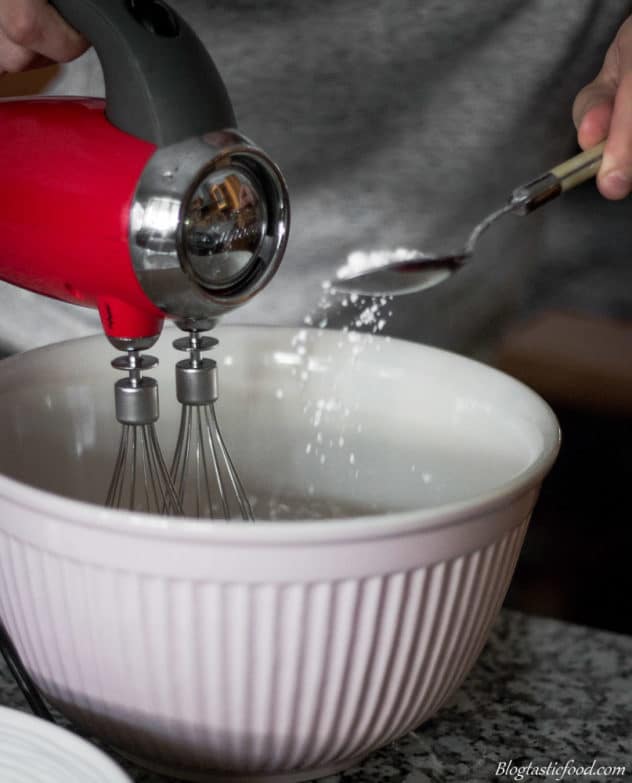
Whatever sugar I decide to use, I like to add it in small increments at a time as I beat it through the meringue just because I think it incorporates more effectively that way.
Non-stick surface
Ok, no messing about here people. You don’t want to make a beautiful meringue mixture and bake them perfectly only to find out that they’re stuck to the tray.
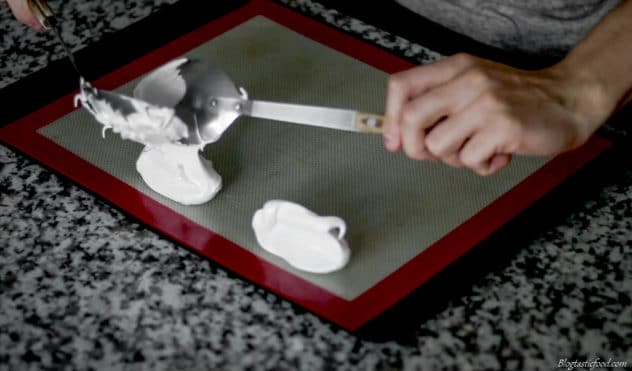
Now, you could use regular baking paper and then spray it with cooking spray. A much better option would be to go buy some grease-proof paper. The BEST option, however, is to go buy a silicon mat. It’s reusable, it’s easy to clean and they don’t let anything stick.
And if your someone who likes to bake often, I highly recommend buying one instead of buying paper over and over again.
Keeping everything clean
Before you start separating the egg whites, consider cleaning the bowl and your whisk (or the whisk attachments if using a machine whisk) just to ensure that there is no dust or oils on your equipment that may affect the mixture.
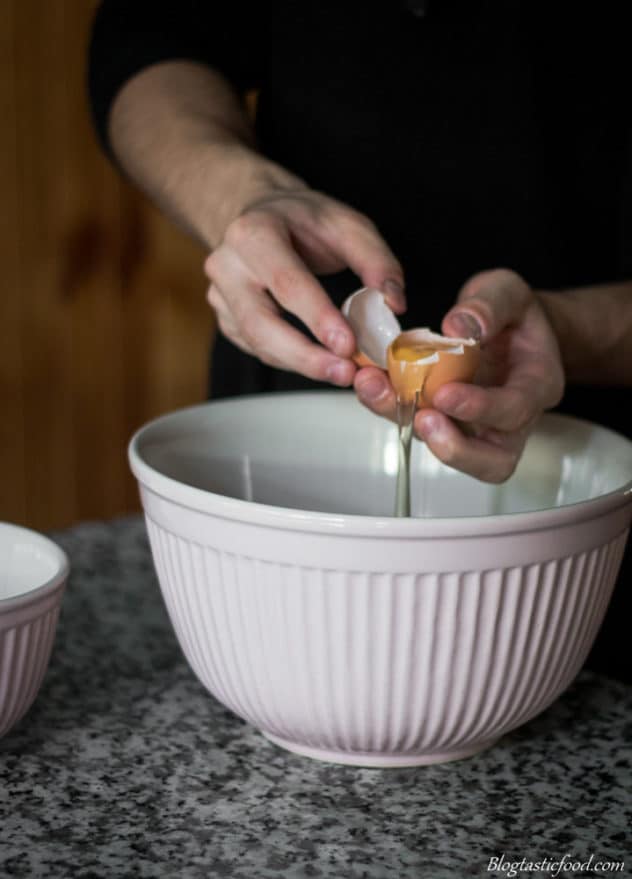
Also, be very careful when separating your egg white, because you don’t want any egg yolk screwing up your meringue mixture. Be conscious of any shell that may have fallen in the egg white before you start beating them too.
Once again, care and attention guys and gals.
As always, thank you for reading through my post, I really hope you learnt something valuable from it. If you enjoy reading about different ways to become a super badass cook, and if you enjoy preparing recipes, feel free to subscribe to my blog. You’ll get a weekly recipe post sent to your E-mail address, and you’ll receive a free E-book featuring 10 fantastic recipes.
Have an amazing day!!
How to make Meringues
I screwed up meringues for a long time. This recipe will show you how to consistently achieve that soft inside and crunchy outside.
Ingredients
- 3 egg whites
- 150 g of icing sugar
- 1 teaspoon creme of tartar (optional)
Instructions
-
Pre-heat your oven to 110 degrees Celsius.
-
Line a baking tray with greaseproof paper or a silicone mat.
-
Add your egg white to a clean bowl. Use an electric beater or whisk to beat the egg white to soft peaks, meaning that the peaks should still curl down when you lift up the whisk/electric beater.
-
Gradually add your icing sugar while beating to stiff peaks. You want the mixture to be smooth and glossy. This would be a good time to add your creme of tartar if you're using it, and then whisk it through.
-
Spoon nice big rustic blobs of meringue on your lined tray, or you can use 2 large spoons to quenelle your meringues. Bake in the oven for 50-60 minutes.
-
When you take the meringues out of the oven, set them aside for 5-10 minutes.
-
Carefully lift the meringues off the baking tray and transfer them onto a plate or store in a container.
-
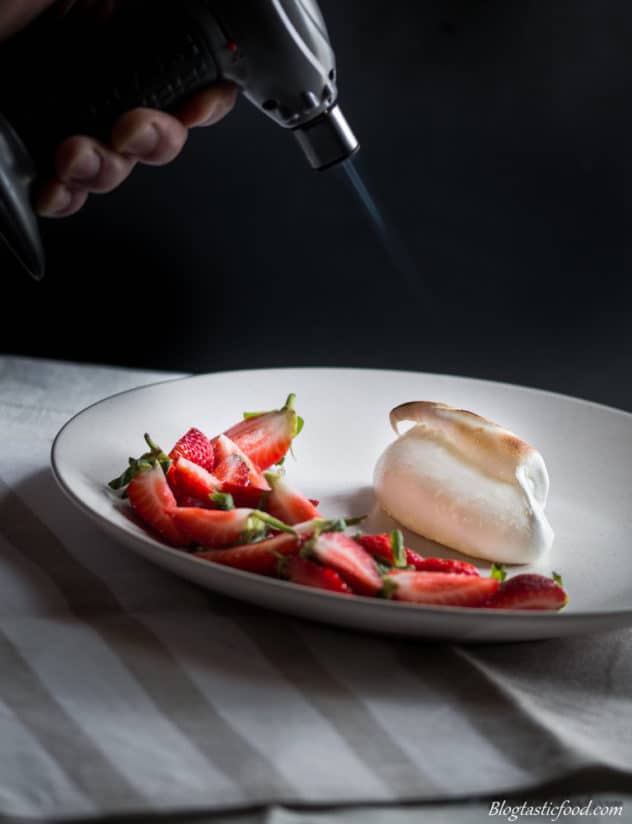
You can eat them just as they are, use them to garnish desserts you make in the future or you can make mini pavlovas etc. Enjoy!
Recipe Video
Recipe Notes
- Cook the meringues slowly on low heat in the oven.
- If you want, you can add some crème of tartar (an acidic powder) to the meringue to stabilize the mixture.
- Add icing sugar instead of caster sugar as it dissolves quickly and it will make the process a little easier.
- Incorporate the sugar slowly as you beat it through the meringue.
- Clean your bowl and whisk before beating your egg whites to ensure that there is no leftover marks or water that can affect your meringue mixture.
- Be careful when separating the eggs, don't let any yolk get into the egg white.
- Once you've made the meringue mixture, don't just let it sit there. Get it on the tray and into the oven as soon as you can.
- Buy a silicone mat, it's a very useful non-stick surface and comes in handy when you make something like meringues.
Other dessert posts you may like
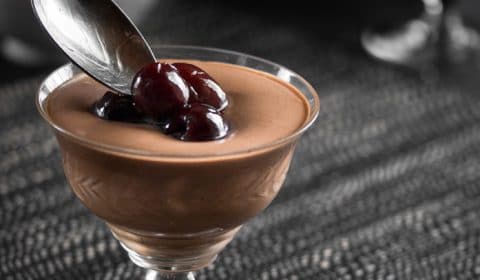
Mint Chocolate Mousse with Booze Soaked Cherries
I haven’t mastered the gooey inside either. Oh well, they’re still good with some whipped cream and fruit on top. Sometimes I stir curd into the whipped cream for extra flavour.
Great job and pictures! Thank you for sharing the valuable tips.
beautiful elegant photos and helpful tips too 🙂
Thanks so much for the kind comment! Keep up the great work your doing on your site too!!
My pleasure! Thank you for visiting and commenting!
Great Job and informative post. Thank you!
Great advice! Thanks for sharing 🙂
My pleasure thank you for the comment!
My pleausre Lauren, thank you for visiting!
Love these step-by-step instructions! I’ll be trying for sure!
So beautiful! I’m off to check this out because i’ve never made meringues before! Thank you for sharing.
These are always such a holiday favorite. Thanks for all of the tips!
Thank you so much and I hope you enjot making them!
Give them a go!! I hope they go well for you!
Nice! Can’t say no to a good meringue! (:
im 11 and i can make these, so simple, thanks so much for sharing your valuable tips!
I am so sorry for such a late reply but this comment means so much to me…..thank you so much!! (: