As you can probably already tell by the title, I am going to be talking about the props I like to use when I take food photos (specifically for dark food photography). And that is because I have been inspired by a camera company called Light. Their website is https://light.co/ and to anyone who is interested in any sort of photography, I highly recommend checking out this website.
Now I have been reading and experimenting with photography, food photography, cameras, lighting etc. for a bit over 2 years now. And I have learnt a lot in those 2 years. So I needed to break this down into one specific theme. When someone starts their journey with photography, they will start to both consciously and naturally develop a style. And when it comes to food photography, my style is dark food photography. Every once in a while I will try something a bit different. But that is what stands out to me the most.
And since I have received a lot of good feedback on this topic, especially on Instagram. I thought it would be something a good handful of you may be interested in. And if you are someone who is passionate about food photography. Going over these props will hopefully be a simple way to help level up your photos. Ok, so let’s get into it.
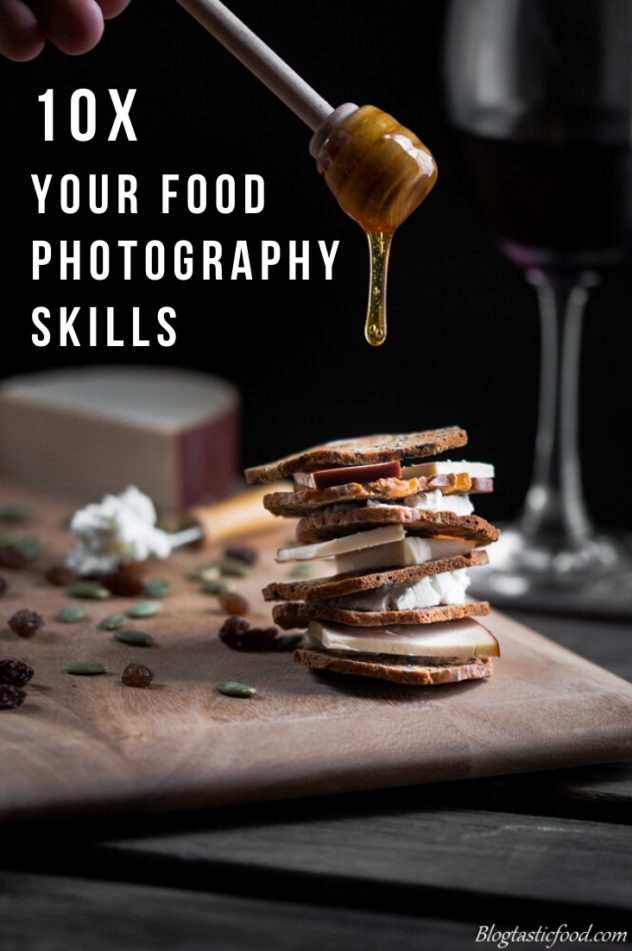
Dark Food Photography:
DIY Backgrounds:
So what I used to do was get different colour sheets of quill from the news agent (quill is basically a really thick piece of paper). And I have to say, this wasn’t the smartest of ideas. In fact, I can’t believe how long I dealt with trying to take a picture, then all of the sudden my stupid paper background falls over on top of my set up before I have a chance to take a picture. Here is what you do.
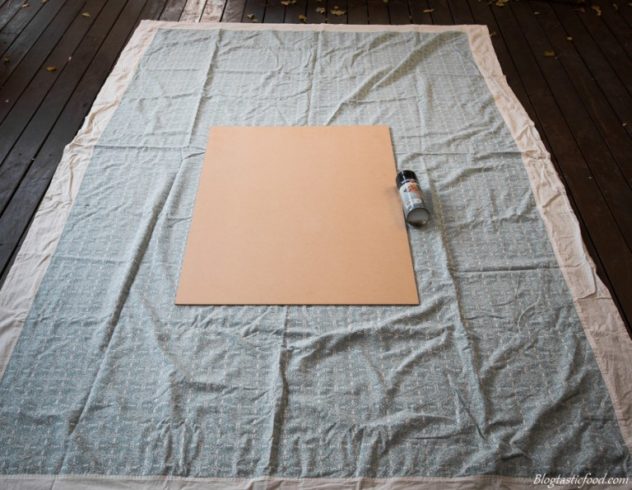
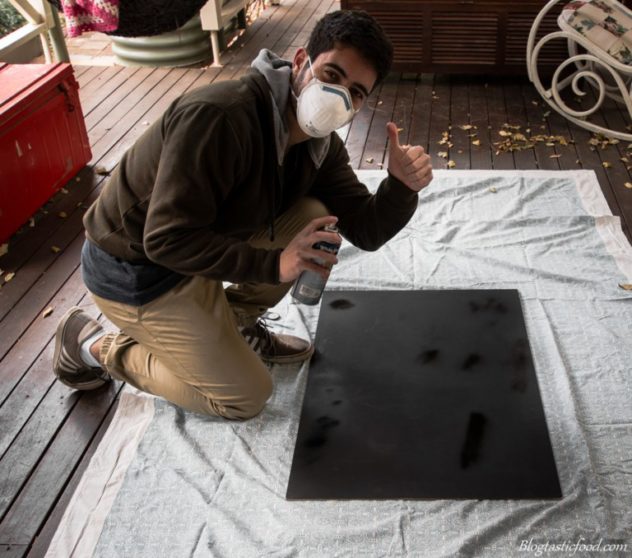
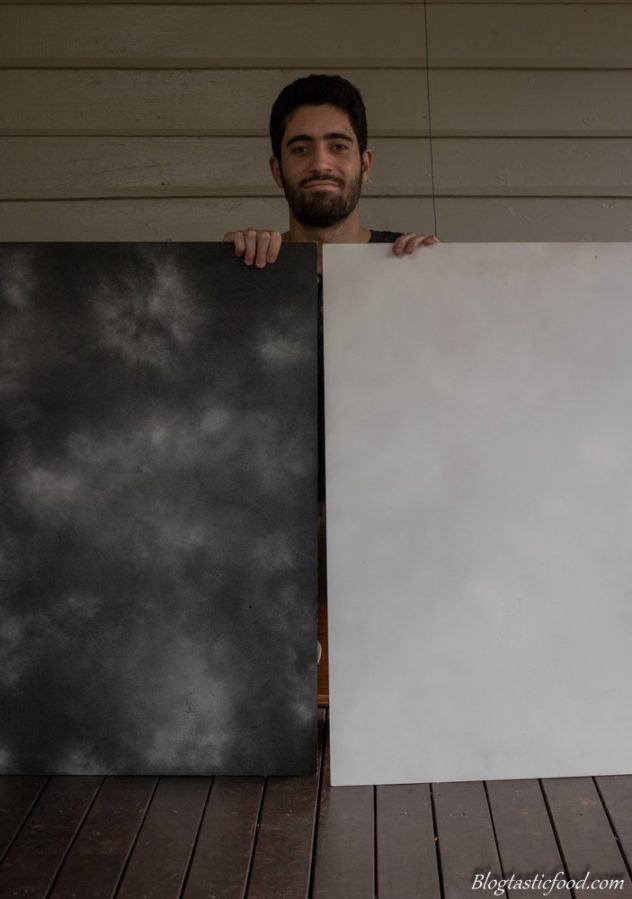
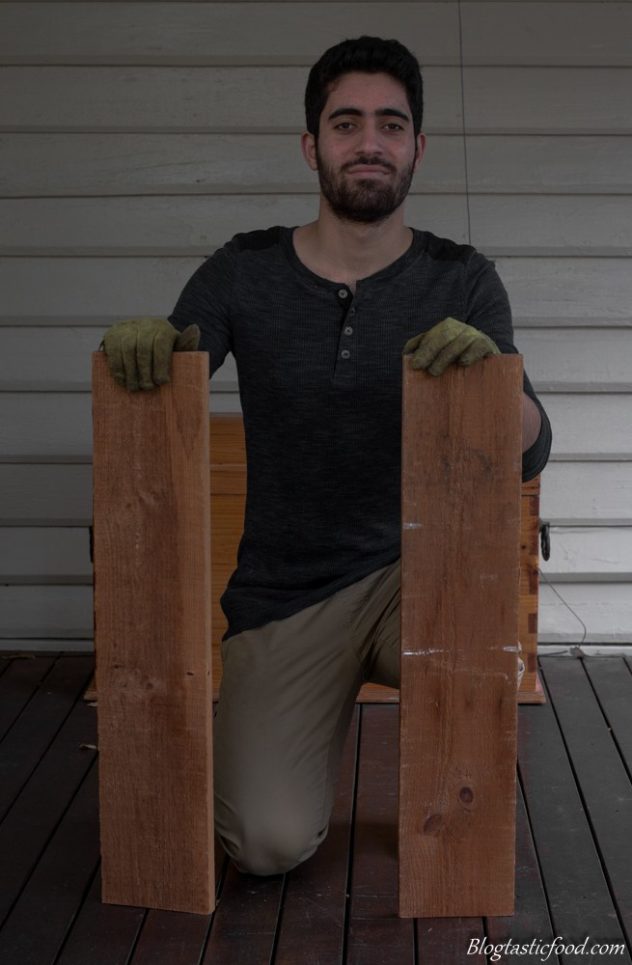
You go to a hardware store, and you get some cheap wooden boards (timber wood is the way to go since it is very cheap and light), and some spray paint. That is it! Super simple, and I got 3 colours. Black, white and metallic, obviously you can experiment with more colours, but this is a good starting point. So just take an old rag and lay it down in your back yard, so that you don’t make a mess on the floor. Then put your wooden board on top of that rag. I recommend putting a dust mask on because the spray paint can have a strong smell, and you don’t want to be inhaling any toxic fumes.
From there, just spray away. Now with the metallic, I didn’t spray the whole board with metallic paint, as it is important not to overuse this colour. Instead, I sprayed the board black, then I just added quick, light sprays of the metallic over the top, and that made a really nice effect.
Surfaces:
Some of you may be thinking that a nice modern, smooth and clean looking surface is the way to go. But not me baby! And although that works for many different people and many different styles of food photography. I am all about those old rustic wooden surfaces. Almost like something you would see in a vintage or medieval movie. It just has such a lovely texture that works so well with the darkness in the photo. And that is a key word I think you should keep in mind when looking for surfaces and props for dark food photography…” texture”.
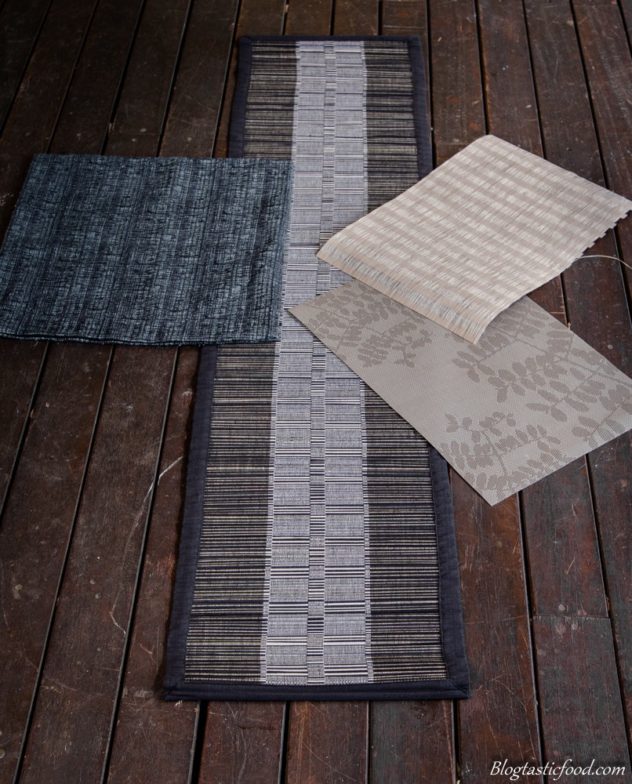
Here are a couple of placemats and cloth surfaces that I use. Again, they have some interesting textures that look very nice in the photo, and they are quite dark. Remember, you don’t want your surface to draw focus away from the food. So have a good look around in kitchenware stores and see what you can find, and keep an eye open for old, chipped, rustic planks of wood.
Plates:
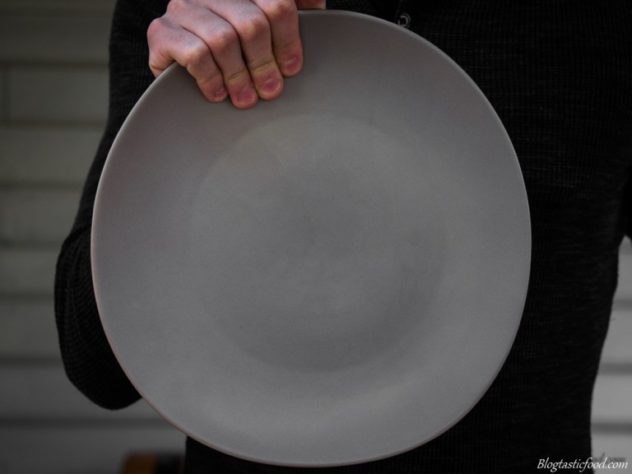
So when it comes to plates, bowls, platters etc. you may notice that most of them have a glossy coating. Like this plate for example:
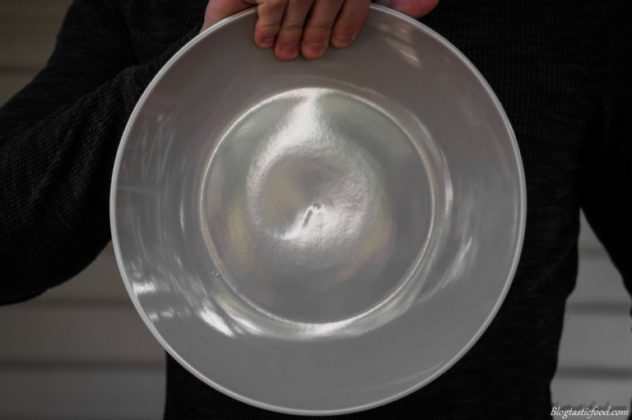
Now it is a lovely plate, and I am not saying that you should never use it. However, do you notice how strong the reflection is in the light? This can be a big distraction in the photo, and once the viewer notices it, it is impossible to stop noticing. So what I suggest is looking for a range of plates and bowls that have a satin or matte coating. These plates are not reflective, and they only reveal the soft fade-like light. Here is the difference:
Other props:
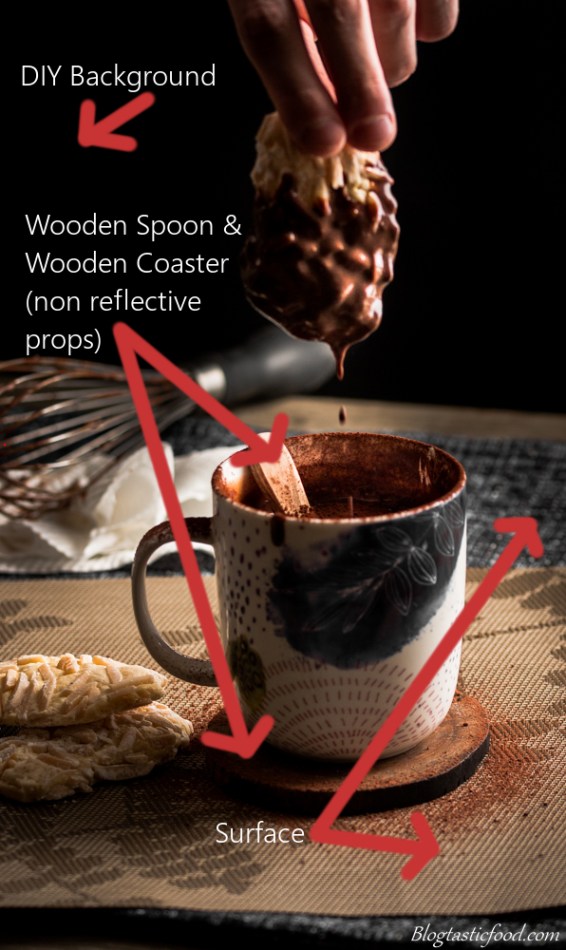
As for other props like cups and cutlery go, well it’s a similar guideline to what I mentioned before. Old, rustic and something that doesn’t glare and reflect too much. Things like wooden spoons and little wooden bowls work really nicely. Even the coppery, rusty metal cutlery works really well in dark food photography.

So I set everything up next to a window during the day, where all of the lovely natural light comes through.
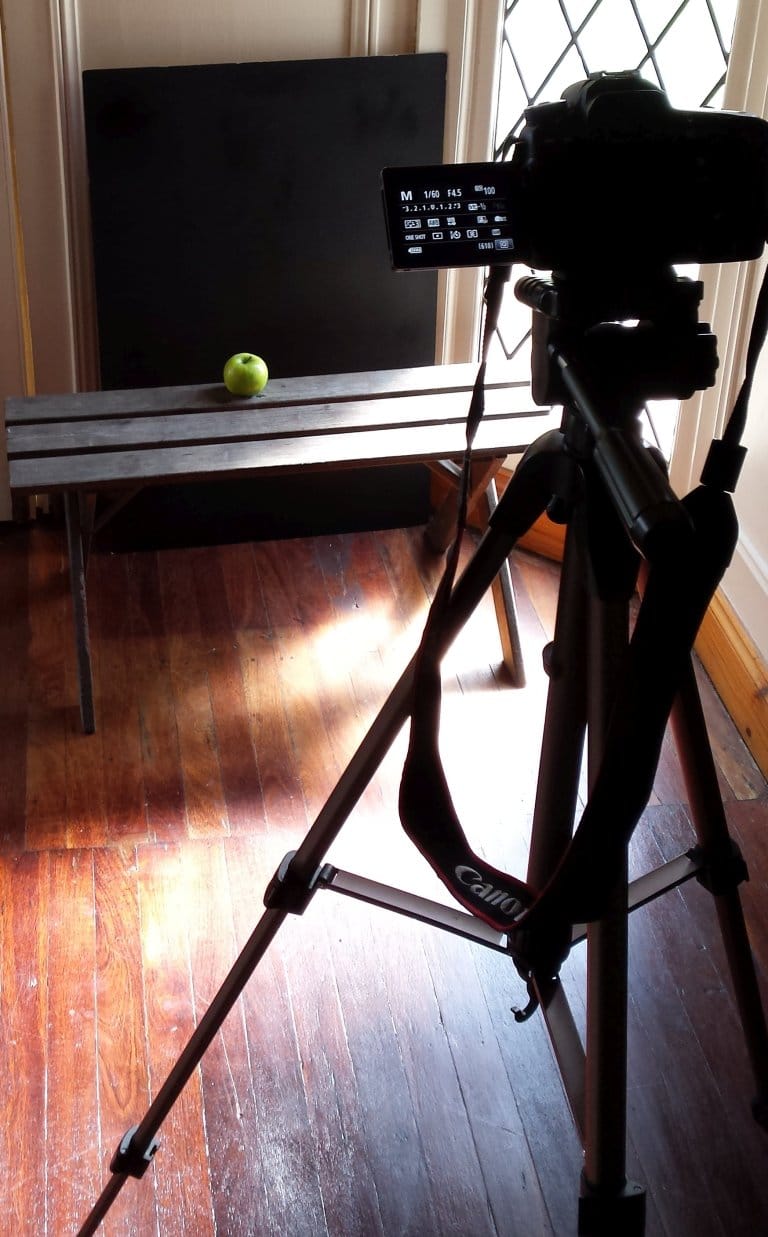
I have my surfaces and backgrounds ready. I like to use a tripod as you can see, then I can set up where I want my props. However some people like to go freehand, so don’t be afraid to experiment so you can find out what works for you.
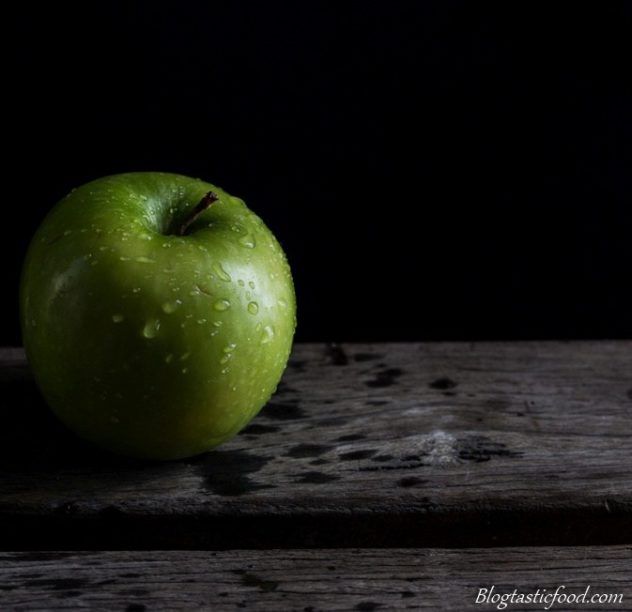
Here is what a basic shot looks like:
And if you want to challenge yourself, here is what a more complex photo looks like:
As you can see, the beauty of dark photography is that it can make the most simple ingredients or dishes look stunning. Even if it’s something like a handful of nuts, or a single berry. You don’t have to spend hours cooking to take a good food photo.
So there you have it. Some prop tips for dark food photography. Remember not to take this advice too strictly, all of these tips are guidelines, not rules. Now, of course, this barely scratches the surface when it comes to food photography, so if you want to know more, check out my Food Photography Tips and Tricks page. And again, I highly recommend checking out the company “light” (the website is linked in the first paragraph), and if you’re interested in learning more, you can check out Light’s Pinterest page.
If you’d like to check out my food photography mastery course, click the photo below or click here. I really hope that you got something valuable out of this article. Please leave a comment letting me know what you thought.
If you want to check out my Instagram feel free: @blogtastic.food.photography
Leave a Reply