Welcome, this page will give you a bunch of ways to improve your food photography. My food photography tips and tricks page has been getting a lot of views lately, which I recommend you check out as well, as it has some great valuable insight into basic food photography. But because everyone seems to love it so much, I thought “why not expand on it?” Food photography has only become more and more of a passion over time for me, and I always learn more as I go. And I want to share this with you lovely people in a way that will allow you to learn techniques quickly, but effectively too. And share some tools that you may not have considered yet. So let’s go into it!!
Plan your shots
Before I actually start shooting, 90% of the time I already have a clear vision of what I am going to shoot, how I am going to shoot it and what I want to achieve. So brainstorm, and ask yourself what it is you’re going for, and how do you want the viewer to feel when they see the image? Do you want them to be hungry? Do you want them to have a sense of how easy the recipe is so they have a better chance of making it? Should the picture to have a fancy restaurant vibe or a rustic home cooking feel to it? It is also important to have an idea of what kind of angle you are going to shoot from. What kind of props, platters and surfaces you are going to use etc.
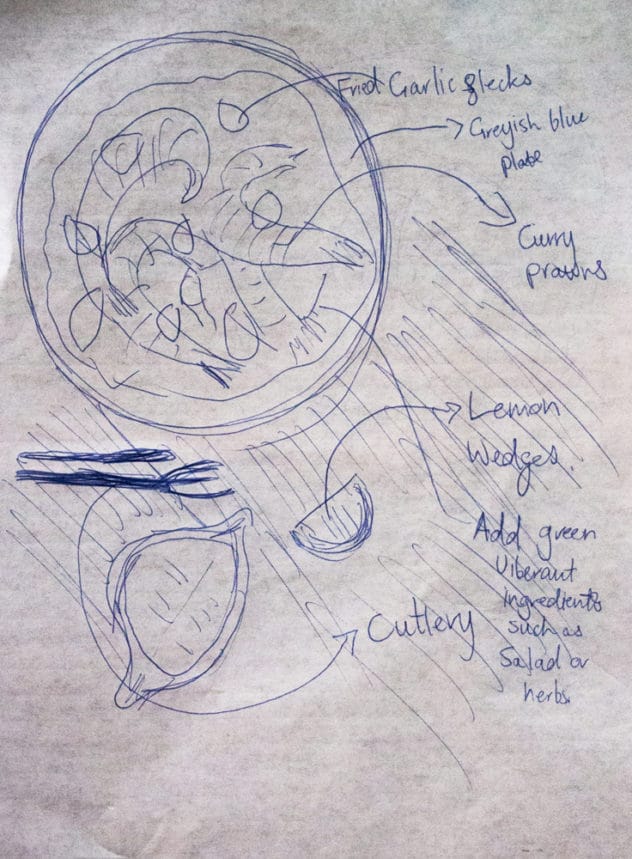
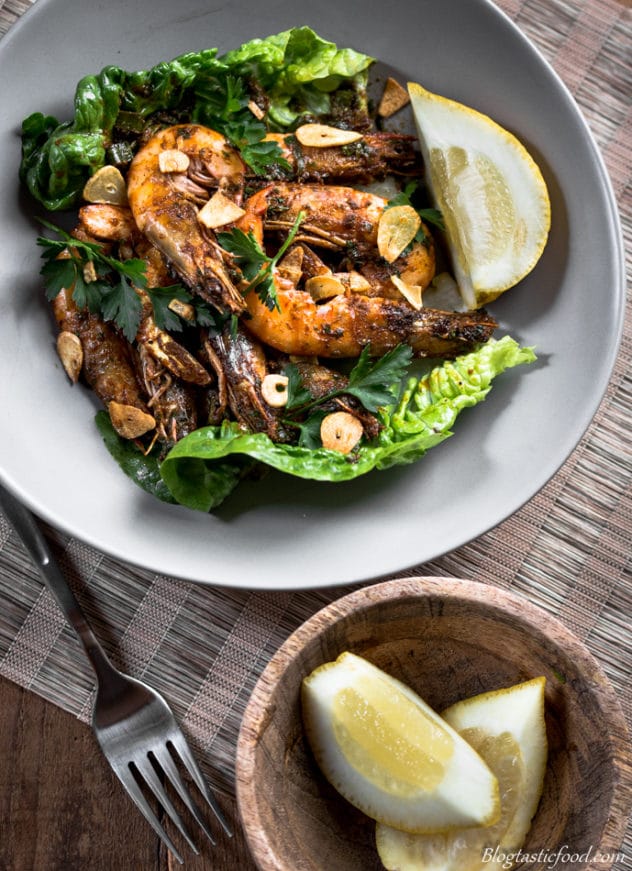
So this is my planning for the curry prawns shot. As you can see, it isn’t the prettiest artwork in the world. You are probably struggling to read the dang thing. And not everything in the final shot is done the way I planned it out. In fact, sometimes the final shot may be completely different to how I planned it but none of that really matters. The point is to have some kind of idea of how you are going to capture your subject so you don’t waste time wondering about it whilst doing your photo shoot. Trust me, planning your shots will help you to separate yourself from the average foodie Instagrammers who post pictures of a Starbucks Frappuccino for the 50 millionth time.
Focus on the elements
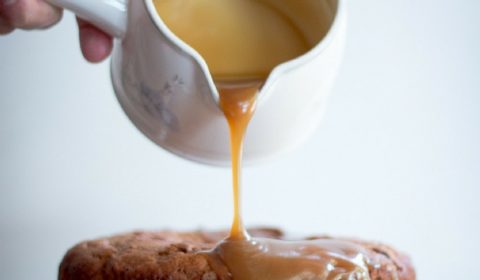
This doesn’t apply to every image, but if you notice a certain element of the food that you are shooting. For example, an ooze, vibrant colours or a pattern in the food that may help the image stand out. Use these elements as an opportunity. This is the kind of thing people want to see when it comes to food porn and in my experience, these shots do very well on social media. And you may have noticed this yourself. How some of the most popular food images on let’s say, Instagram or Twitter, aren’t even that professionally taken. It could just be a simple iPhone shot. But because it focuses on these key elements, it still ends up getting a lot of attention.
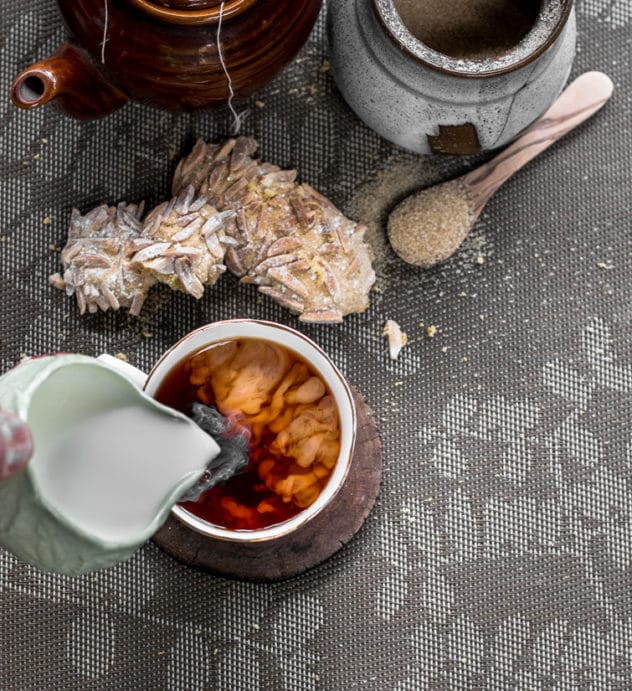
As you can see, this can even be done with something as simple as a cup of tea. So you don’t have to go nuts trying to make huge, stunning expensive dishes. This just requires a bit of thought and creativity. Think about shooting a kettle of boiling water. Your first thought may be “boring!”, but then think about capturing the steam rising, and the rapid boiling bubbles. Perhaps the kettle can be surrounded by different kinds of tea and vintage looking cups. Suddenly the image becomes a lot more interesting. This is probably the best piece of advice I can give, especially to people who don’t have a DSLR camera and other fancy equipment. If you can find something about the food that makes it exciting, it is almost difficult to take a bad shot.
You don’t always have to shoot the end result
Whenever you cook, understand that the food goes through a process. A process where a bunch of raw ingredients get transformed into a tasty dish at the end. Sometimes, the best food photos are the ones that show the ingredients going through that process. You could get a picture of the cake batter being poured into the tin, or a picture of the ingredients getting tossed in the pan, or perhaps someone dusting the dough with flour. These shots can be super effective, especially for a food blogger.
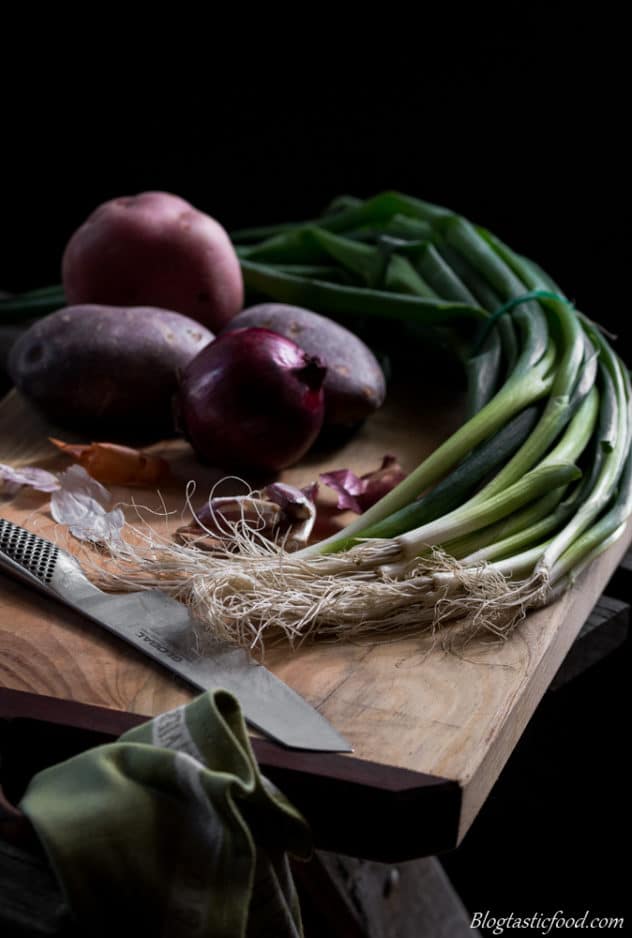
Imagine if I made a recipe post, and this was the first image in the post. What kind of effect does this make to your viewers? If you ask me, I would say it makes the audience curious, and at some level, they may be thinking “hmmm so what is going to happen with these ingredients? How will they be cooked? How will it all come together?” You get the idea? It’s a great way to get your viewers engaged. So next time you shoot, or perhaps if you’re running out of photo ideas. Try to think about the process that the food goes through in a dish and see if you can’t jot down some ideas of what may be worth shooting during that process.
Find your style
Are you someone who usually likes your pictures to have a light, healthy look with bright backgrounds? Are you a girly girl who likes baking and loves the light pink colours and pink frosting and unicorns in your shots? Or maybe you are like me and you love the dark, dramatic contrasty look. What kind of food do you like shooting and why? Do you like to take the really sexy close-ups, or do you focus more on composition? Or perhaps a bit of both? What kind of props do you like to use? These questions can be super important for your food photography journey.
And what I like so much about it is that you are going beyond just reading this article and implementing some advice. You are finding your own uniqueness. And I do believe that your own style partly comes naturally but I think it is also important to be conscious of it too. It is a great way to stand out. But of course, at the end of the day, experience and taking many, many shots is the best way to figure this out, so don’t just spend all day thinking about it.
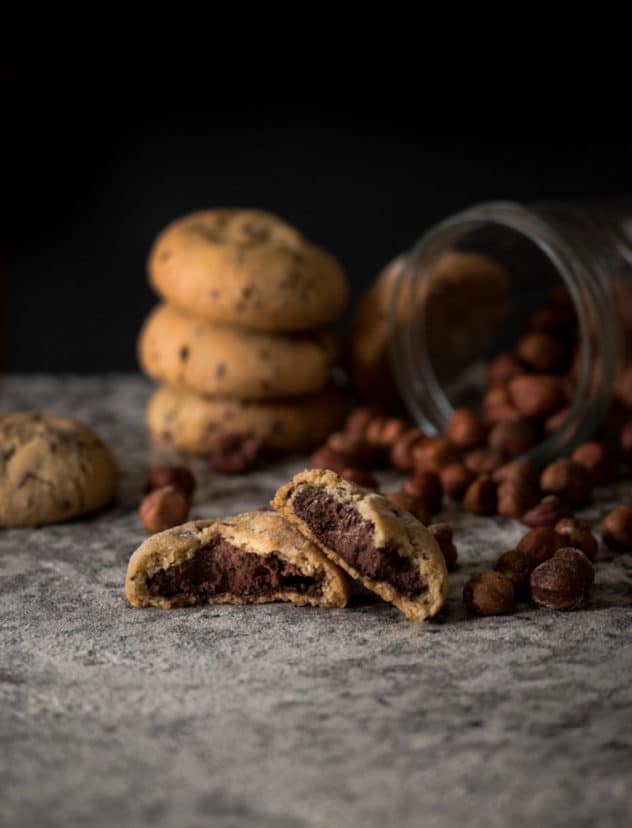
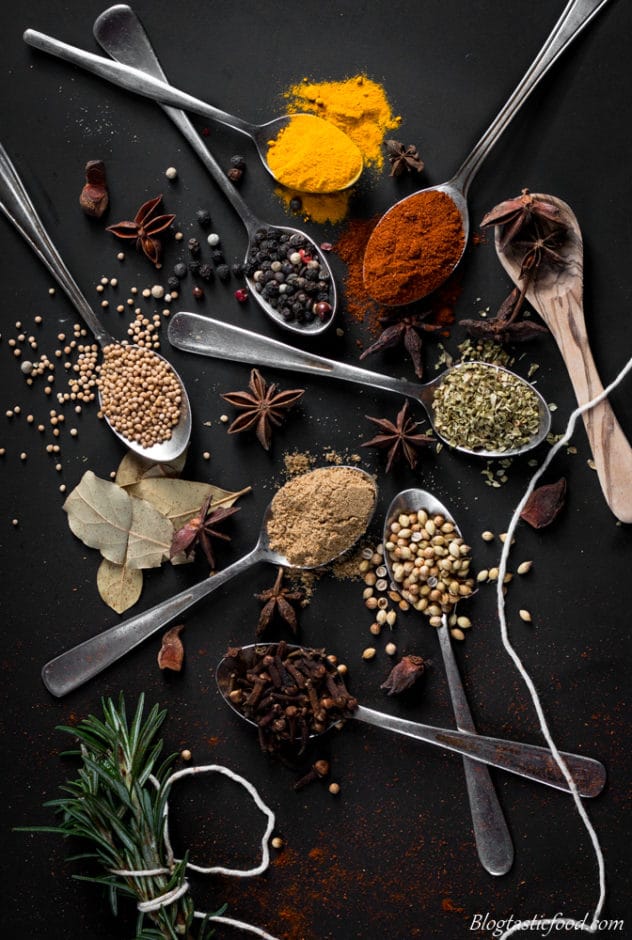
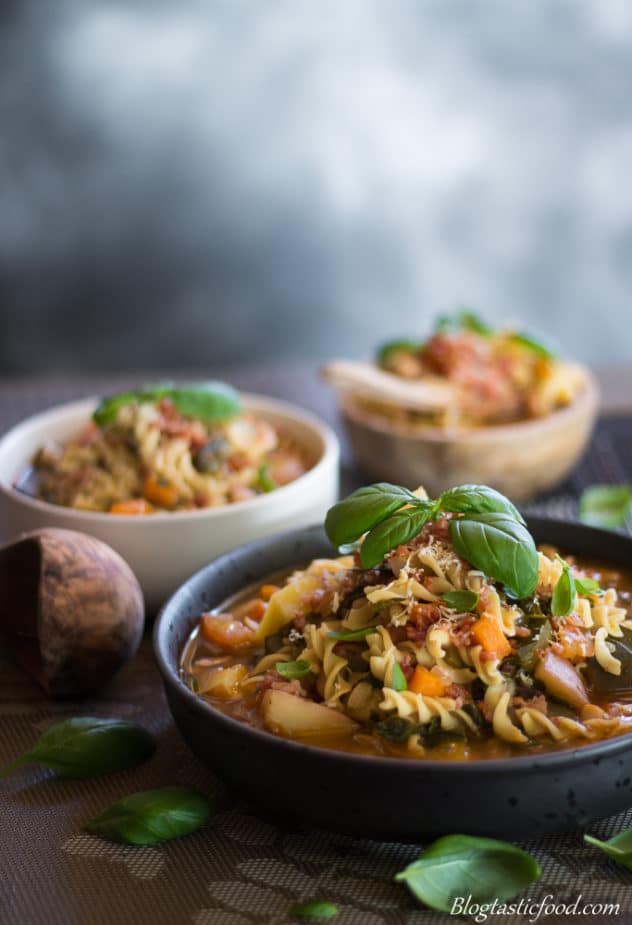
This is a great example that represents my style of food photography. Again very dark, lots of contrast and the food is the most visible thing in the shot.
Three effective angles for food photography
Overhead shot– Now don’t get me wrong I do like this shot. However, I think it is slightly overused nowadays. If you agree or disagree with this, leave a comment down below. Now if you are going to do this with a tripod, it can be a bit tricky but I manage to pull it off. The reason it is tricky is that when you try to capture an overhead shot on a tripod, the legs of the tripod will be exposed. So you won’t be able to face the camera down 100%. But I just face it down on the food enough to get the effect of an overhead shot. And if the legs are still a bit exposed I just crop them out in editing.
If you don’t want to deal with that, there are 2 things you can do. One, invest in an arm extension for your tripod. I haven’t used these but I have seen them in use when people shoot those overhead recipe videos. But remember that these aren’t usually very cheap. So it is important to think about how much you are going to use it and whether it will be worth your investment. And two, just go free-hand instead of using a tripod. You may be someone who already does this. I do use freehand from time to time when taking an overhead shot, but very rarely. It is a bit tricky for me because most of the time, I don’t get enough light coming through to have a fast enough shutter speed.
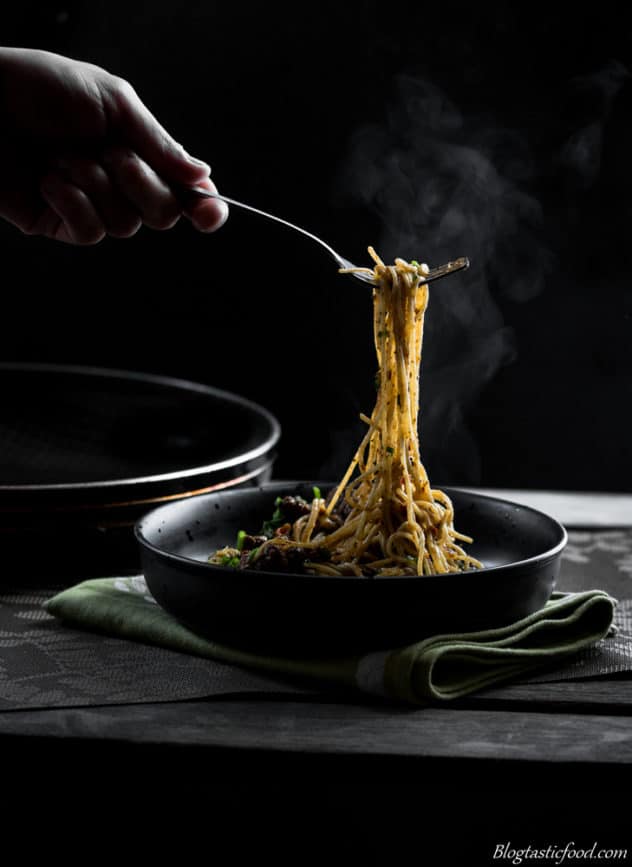
The 45-degree angle– This is the angle I usually go for. Just remember that 45 degrees is an approximation. It’s a great way to show the subject in full focus while having the other stuff blurred out. For example, having the steak in full focus, but then having the bearnaise sauce and the cutlery out of focus in the background.
Eye level shot– This is one that I have been getting into a lot lately. Well, at least during the time I am writing this. This is a great angle for the “focus on the elements” tip that I just gave before. Showing off a drizzle of caramel, or in this case, showing off what is inside your tasty burger. I really like this angle because, in my experience, not only does it look aesthetically pleasing. It also tends to make the viewers really hungry. Which is probably the best outcome you can get as a food photographer right?
Garnish, Garnish, Garnish
I think this is a tip for food in general, whether you are photographing it or not. A dish can look so plain when you don’t garnish it. And there are so many ways of doing it. There are many simple ways and then there are a lot of technical ways. You can sprinkle herbs, add pomegranate seeds, peel over thin strips of cucumber, put edible flowers on your cakes, sprinkle some Cayenne pepper on the sides of the plate. You get the idea. I was just about to write down “the more time you spend working on your garnish the better it will look”. However, after thinking about this I realised that this isn’t necessarily always true. A quick and simple garnish may be more effective for let’s say, a rustic homemade stew.
Besides, I do think that it’s possible to overwork your garnishes. So instead, I’ll say that the more time you spend working on your garnish, the more complex and pretty the dish will end up looking. Which again, doesn’t always mean better. So have a good think about the colour, vibrancy, and different ways to decorate your dish.
See the difference?!!
Conclusion
I really hope this helped and that at least some of the tips can support you throughout your food photography journey. If you are just beginning I guarantee you that applying these tips will make a difference. Feel free to leave a comment below to give your thoughts. And if you want to learn more about food photography, check out the other pages that I have on it. Have an awesome day, and thanks so much for the time you have spent here.
Feel free to check out my Instagram account:@blogtastic.food.photography
And if you would like to check out my food photography mastery course, click the photo below.
Great article! Thanks for all the advice for those of us trying to improve 🙂
Thanks no worries! Thanks for checking it out (:
This was very helpful!
Glad I was able to help (: